uni-app
提示
uni-app是一个使用Vue.js开发所有前端应用的框架,开发者编写一套代码,可发布到iOS,Android,H5,以及各种小程序(微信/支付宝/百度/头条/ QQ /钉钉)等多个平台。
1. 初始化工程
1.1 新建工程
工程新建通过HBuilder菜单文件->新建->项目,如下图,选择默认模板新建工程。 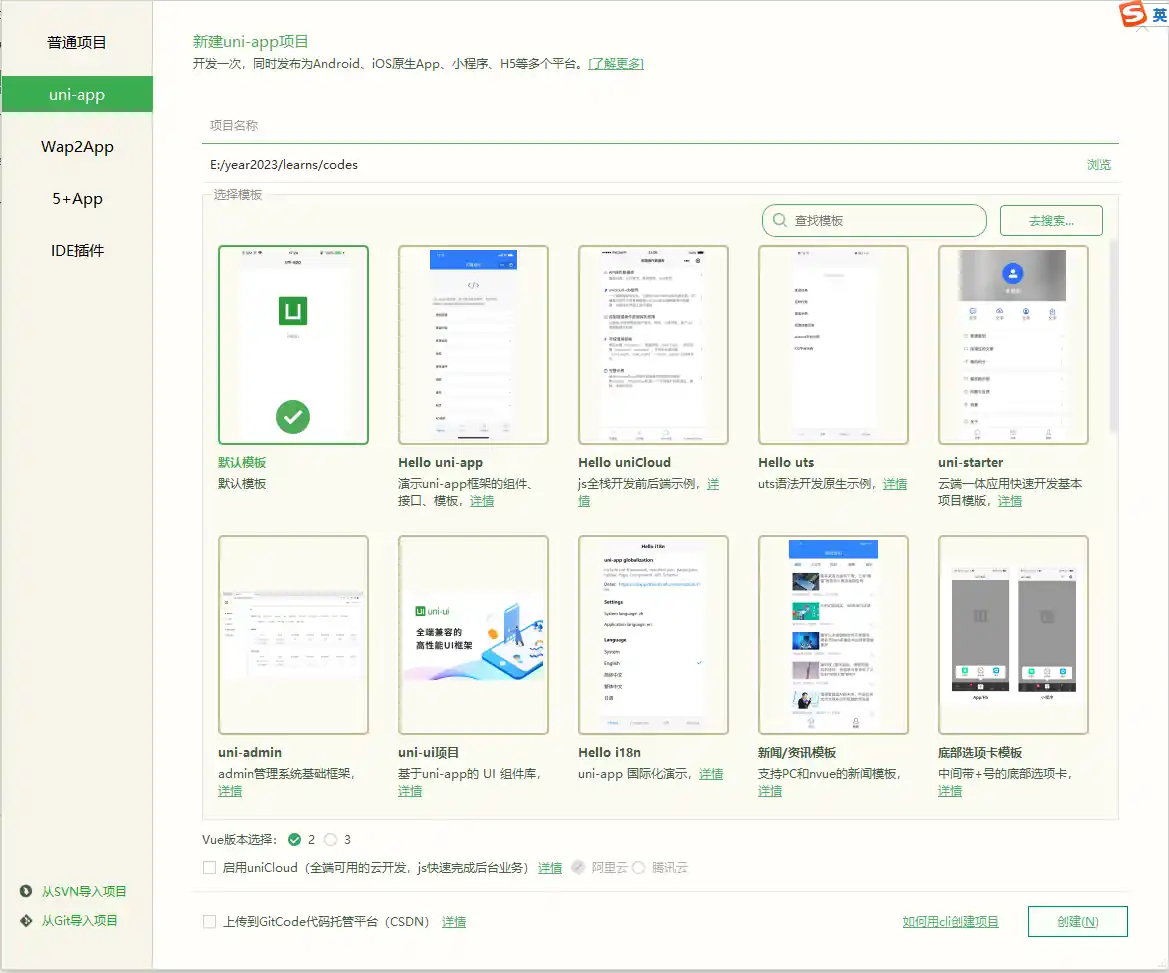 创建完成后,工程目录如下:
1.2 运行
如下图,通过菜单运行->运行到浏览器->Chrome运行。 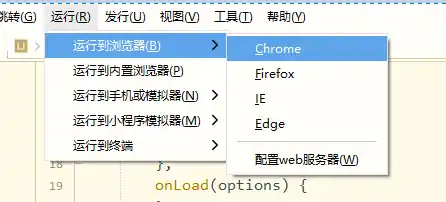 运行后在浏览器中输入
http://localhost:8080访问系统。
2. 配置工程
2.1 添加调试工具
添加调试工具vconsole,需添加依赖,添加操作如下:
npm init -y
npm i vconsole -D修改main.js,添加如下代码:
// #ifdef H5
// 本地调试和测试发布使用,生产打包需要注释
const vconsole = require('vconsole')
Vue.prototype.$vconsole = new vconsole() // 使用vconsole
// #endif
2.2 web端配置
如下图,打开manifest.json,会出现可操作界面,点击切换到“Web配置”。 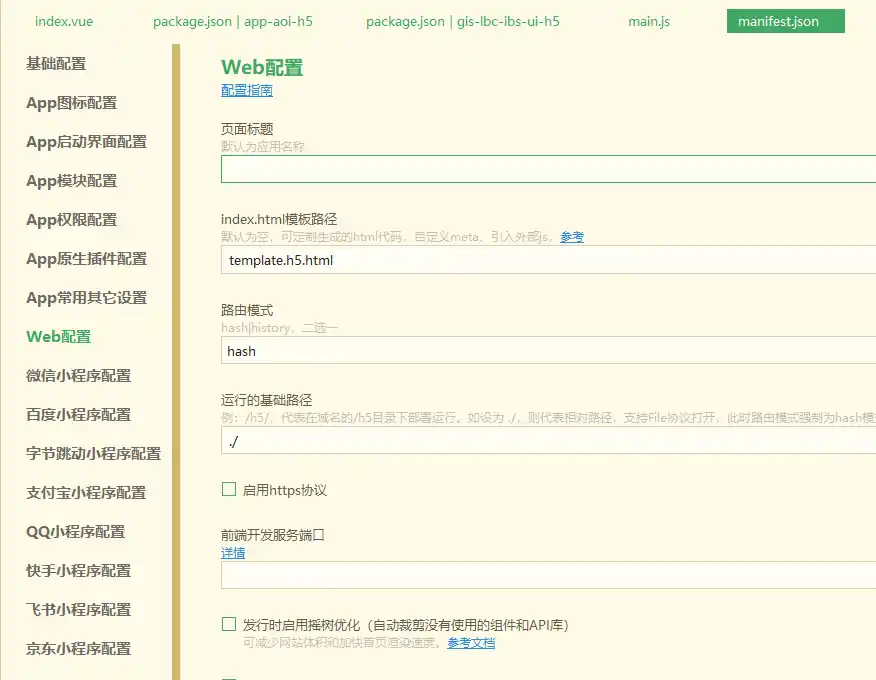
1)模板路径
在根目录下创建文件template.h5.html, 文件内容如下:
<!DOCTYPE html>
<html lang="zh-CN">
	<head>
		<meta charset="utf-8">
		<meta http-equiv="X-UA-Compatible" content="IE=edge">
		<meta name="viewport" content="width=device-width, user-scalable=no, initial-scale=1.0, maximum-scale=1.0, minimum-scale=1.0">
		<title>
			<%= htmlWebpackPlugin.options.title %>
		</title>
		<!-- 正式发布的时候使用,开发期间不启用。↓ -->
        <!-- <script src="/h5/touch-emulator.js"></script>
		<script>
            TouchEmulator();
			if (document.documentElement.clientWidth > 1024) {
				window.location.href = '/h5/pcguide.html#'+location.pathname+location.search;
			}
		</script>
        <style>
            ::-webkit-scrollbar{
                display: none;
            }
        </style>
        <script>
            var _hmt = _hmt || [];
            (function() {
                var hm = document.createElement("script");
                hm.src = "https://hm.baidu.com/hm.js?";// 百度统计key
                var s = document.getElementsByTagName("script")[0];
                s.parentNode.insertBefore(hm, s);
            })();
        </script> -->
        <!-- 正式发布的时候使用,开发期间不启用。↑ -->
		<script>
			// document.addEventListener('DOMContentLoaded', function() {
			// 	document.documentElement.style.fontSize = document.documentElement.clientWidth / 20 + 'px'
			// })
		</script>
		<link rel="stylesheet" href="<%= BASE_URL %>static/index.<%= VUE_APP_INDEX_CSS_HASH %>.css" />
        <!-- 丰声微应用需添加此脚本引用 -->
        <script src="cordova.js"></script>
	</head>
	<body>
		<!-- 该文件为 H5 平台的模板 HTML,并非应用入口。 -->
		<!-- 请勿在此文件编写页面代码或直接运行此文件。 -->
		<!-- 详见文档:https://uniapp.dcloud.io/collocation/manifest?id=h5-template -->
		<noscript>
			<strong>Please enable JavaScript to continue.</strong>
		</noscript>
		<div id="app"></div>
		<!-- built files will be auto injected -->
        <!--外部及静态引用位置-->
		<script src="https://lbs.sf-express.com/api/map?v=2.0&ak=664e42802f604c35b8afa2de864c55cb"></script>
		<!-- <script src="<%= BASE_URL %>static/turf.min.js"></script> -->
	</body>
</html>
2)路由模式
路由模式选择hash模式。
3)运行的基础路径
运行的基础路径为./,这样可保证打包后的路径为相对路径。
3. 工程配置
3.1 修改工程结构
添加如下文件夹,文件夹及说明如下:
- assets  // 资源目录,如用的图片,css文件,mock数据等
- components // 组件目录,每一个组件新建一个新的文件夹,主入口为index.vue
- pages // 默认会创建,页面目录,每一个页面一个新的文件夹,主入口为index.vue,跟pages.json文件中的配置应一致
- utils // 工具类目录,如封装的request.js等
- static // 静态资源目录,如外部引用的js、图片等,可根据需求创建子目录
3.2 页面配置
页面相关的配置在文件page.json中,配置项可参考官网, 默认为:
{
	"pages": [ //pages数组中第一项表示应用启动页,参考:https://uniapp.dcloud.io/collocation/pages
		{
			"path": "pages/index/index",
			"style": {
				"navigationBarTitleText": "首页"
			}
		},
      {
        "path": "pages/map/index",
        "style": {
          "navigationBarTitleText": "地图",
          "app-plus": {
            "titleNView": false // 不显示标题
          }
        }
      }
	],
	"globalStyle": {
		"navigationBarTextStyle": "black",
		"navigationBarTitleText": "uni-app",
		"navigationBarBackgroundColor": "#F8F8F8",
		"backgroundColor": "#F8F8F8"
	},
	"uniIdRouter": {}
}
3.3 底部tab配置
底部tab相关的配置在文件page.json中,通过tabBar节点进行配置,相关配置可参考官方文档。配置示例如下:
{
  ...,
  "tabBar": {
    "color": "#bfbfbf", // 字体颜色
    "selectedColor": "#2182ff", // 选中后字体的颜色
    "borderStyle": "black", // 边框颜色
    "backgroundColor": "#FFFFFF", // 背景颜色
    "iconWidth": "20px", // 图标大小
    "list": [{
      "pagePath": "pages/index/index", // 页面路径,需在前面pages里添加
      "iconPath": "static/images/tab1.png", // 默认图标
      "selectedIconPath": "static/images/tab1-active.png", // 选中时的图标
      "text": "首页" // 页面文字
    },
      {
        "pagePath": "pages/map/index",
        "iconPath": "static/images/tab2.png",
        "selectedIconPath": "static/images/tab2-active.png",
        "text": "地图"
        // "visible": false
      }
    ]
  }
}
可通过
sfmap-cli下载完整的示例代码
4. 开发相关
4.1 下拉刷新
下拉刷新是page的配置,需要在page.json中针对单个页面添加enablePullDownRefresh和pullToRefresh配置,如:
{
  ...,
  "pages": [
    {
      "path": "pages/index/index",
      "style": {
        "navigationBarTitleText": "首页",
        "enablePullDownRefresh": true, // 启动下拉刷新
        "app-plus": {
          "titleNView": false,
          "pullToRefresh": { // 下拉刷新配置
            "support": true,
            "style": "circle",
            "color": "#2584ff"
          }
        }
      }
    }
  ],
}
enablePullDownRefresh与pullToRefresh->support同时设置时,后者优先级较高。
添加了上述配置后,需在对应的页面添加onPullDownRefresh的实现。
{
  ...,
  onPullDownRefresh() {
    this.refreshData()
  }
}
4.2 触底刷新
触底刷新是page的配置,需要在page.json中针对单个页面对onReachBottomDistance进行配置,如:
{
  ...,
  "pages": [
    {
      "path": "pages/index/index",
      "style": {
        "navigationBarTitleText": "首页",
        "enablePullDownRefresh": true, // 启动下拉刷新
        "onReachBottomDistance": 50, // 触底更新
        "app-plus": {
          "titleNView": false,
          "pullToRefresh": { // 下拉刷新配置
            "support": true,
            "style": "circle",
            "color": "#2584ff"
          }
        }
      }
    }
  ],
}添加了上述配置后,需在对应的页面添加onReachBottom的实现。
{
  ...,
  onReachBottom() {
    this.page++;
    this.refreshData()
  },
}
4.3 tab的控制
tab的控制可通过page.json文件和代码进行控制,在page.json中可通过visible控制显隐;在代码中可通过如下代码进行控制,相关接口可参考官方文档
// 隐藏底部tab
uni.hideTabBar({
  complete: e => {
    // 完成后操作
  }
})

// 显示底部tab
uni.showTabBar({
  complete: e => {
    // 完成后操作
  }
})

// 控制单个tab的显隐
uni.setTabBarItem({
  index: 0,
  visible: false,
  success() {
    // 成功后操作
  }
})